Homemade Soap Making: Simple Guide for Beginners
In this blog post, I write about homemade soap making. At the end of reading this, you will learn about making soap, step by step, simple guide for beginners, that I hope you'll love. This soap recipe can also make a good soap base for more beautiful soaps of various shapes, colors and design. Let's dive deep, shall we?
DIY SKINCARE
Anyone can make soap. If you are one of the folks that appreciate DIY skincare, creating your own soaps is one of the things that are a rite of passage. If you're a beginner don't be hard on yourself, start with the basic recipe like this one that I'm sharing in this post. It can be tempting to go all in and create intricate designed, herbal infused, multi-colored soaps and end up discouraged because you had high expectations that don't meet your reality.
Let's get to know what we are making, right?. Soaps is the by-product of mixing alkaline solution like lye and vegetable oils. This process is referred to saponification. This is true soap. Nowadays many 'soaps' are just detergents. But we don't care most of the time because both do the same job of removing dirt, whether be it in your hands, body or clothes.
This cold process soap making is a good start for other soap recipes. You can utilize this soap for soap bases for other more exquisite and unique soaps by adding
Essential oils
Colors
Fragrance oils
Glitter/Mica
Clays
Dried herbs and flowers
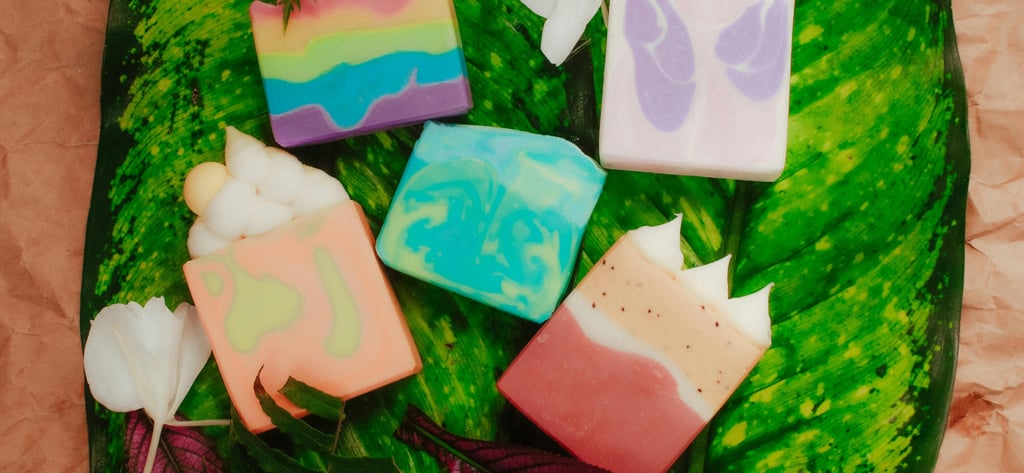
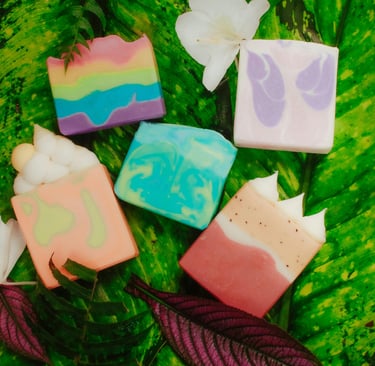
Using cute and intricated molds can produce beautiful and aesthetically pleasing soaps to look at, which get the job done. Let's together make this soap recipe!
SELECTING INGREDIENTS
Distilled water: When making soap, you should use distilled and filtered water because tap water contain impurities such as chlorine or fluoride and trace metals that can affect the final product. You won't get the same quality of soap if you won't use distilled water. Distilled water neutralizes the lye to create a less concentrated solution.
Lye: It is also called sodium hydroxide. It is an alkaline solution that react to saponify vegetable oils and triglycerides to form soap. You can use potassium hydroxide, though it may result to soft soap. Lye is good for making hard soap bars.
Coconut oil: Use unrefined coconut oil for coconut aroma but also unrefined coconut oil forms more lather in soaps. It has high content of triglycerides which combine with lye to form soap.
Palm oil: It is derived from pulp of fruit of palm. It has higher saturated fat with vitamin E content. It is one of good oils for beginners to start with before delving into other oils.
Olive oil: It is cold-pressed from olive fruits. It is high in oleic acid that is responsible for emulsification during soap making process. Olive oil has lots of nutrients that nourish and moisturize the soap.
Cocoa butter: It has a chocolatey scent that lingers after using it on your body. It helps in emulsifying the soap batter. It thickens the soap batter too.
Ingredients
1 and ⅛ cup of distilled water
⅔ cup of lye (Sodium hydroxide)
1 cup of coconut oil
1 cup of palm oil
2 cups of olive oil
1 tablespoon and 2 teaspoon of cocoa butter flakes
CAUTION: Be careful when handling and dealing with lye, it can harm your skin when exposed to it due to its high alkaline nature. Don't inhale the fumes from the reaction between lye and water.
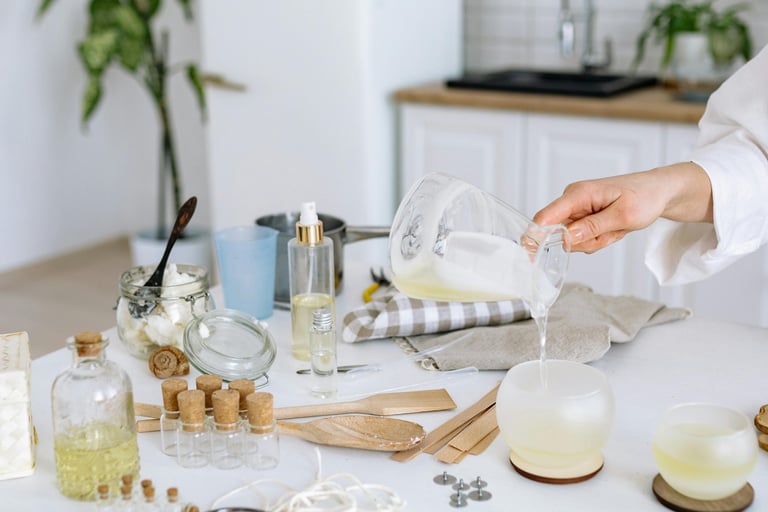
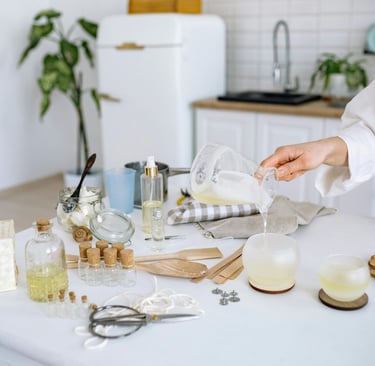
Prepare your gloves, soap box and cutters, measuring spoons, stainless kitchen thermometer, heatproof mixing bowl, glass measuring cups and stirrer. Please gather all your ingredients and tools before starting to make this recipe, you don't want to leave lye just lying around and go looking for a tool or even worse scenario, an ingredient you forgot to buy.
Instructions
Gather your ingredients: Distilled water, lye(sodium hydroxide), coconut oil, olive oil, palm oil and cocoa butter. Before you start, please wear protective gear like goggles and gloves to avoid contact with lye. It can be corrosive so handle with care. Work in a well ventilated room too.
Start by preparing your lye mixture: Use metal container if lye can ruin your glass measuring cups. Measure out your distilled water in container. Slowly and gently add your lye in distilled water and stir. Repeat this procedure till the lye and distilled water are completely mixed. Set aside this mixture to cool down.
QUICK TIP: Always add lye to water and not vice versa. When you add water to lye, the mixture can heat up very quickly due to chemical reaction occurring between water and alkaline solution lye. This can cause the glass container to break due to increase of temperature cause by chemical reaction.
Prepare your oil mixture: After you're done with lye mixture now it is time to make oil mixture. Pour coconut oil, palm oil, olive oil and cocoa butter flakes into a glass measuring cup and place it in saucepan of simmering water. Make sure the oils and butter are completely melted. Stir with a spatula/spoon/glass stirrer to get rid of bubbles.
Make sure your lye and oil mixture are in temperatures between 95 to 105 Fahrenheit or else it will form clumps. Pour your oil mixture in the mixing bowl. Start adding lye slowly into the bowl of oil mixture and stir consistently for five minutes. You can use a hand-held blender at low to medium speed for easier blending and removing air bubbles in the mixture.
It will reach a trace stage, a point whereby oil and lye mixture emulsify, oil and lye combine to form soap, there are thin, medium and thick traces. Trace usually thickens over time. After trace stage, extra oil remaining during the process is called superfat.
Pour your soap batter slowly into a mold. A loaf pan is a good mold for making soap. Shake and bang your pan on the work bench to remove trapped air bubbles.
After 48 hours you can remove your soap from the mold. Don't rush this process if the soap can not unmold leave it for more 12 to 24 hours then try to unmold again.
Cut your soap into equal sized bars and allow them to cure within 4 to 6 weeks in a well-ventilated room or space.
Wrap your soap in beautiful paper. Enjoy!
About me
Hello, my dear gorgeous! Welcome to my blog and learn with me as you walk in your skincare journey. I'm skincare enthusiast and a student. I like sharing my passion of beauty and skincare with the world. I like blogging, reading and binge watching YouTube vlogs and Netflix during my leisure time.

